
Today I’m going to work from an inert file structure (the composer install process we covered yesterday) to a running WordPress site. I have complicated matters a little by opting to put WordPress in a subdirectory of the web root, but it’s not too much of a fiddle. The principle of this series is to handle complexity up front in order to make things easier and more flexible down the line.
So let’s get started with some assumptions about your set up.
Prerequisites
In order to code along further with this you should have the following
- A standard MySQL server installed and the privileges to create new databases
- A webserver configured to point a subdomain to your web root – that is the
site/directory in our file structure. For me, this means thathttps://getinstance.comwill resolve to/var/www/getinstance/site/
For now, I’m going to treat server configuration as outside the scope of this series. Let me know if you’d like an article on it.
Creating the database
First of all, we need a database to install the WordPress tables into. There are all sorts of ways to get this done, so choose your favourite. I use a scratch script – which you’re welcome to use too, so long as you accept the important disclaimer that I make no warranty that the script won’t ruin your data, your server, and your life.
I’ve made the script available on github at https://github.com/getinstancemz/scriptutils. It’s not yet on packagist so we need to add it to the repositories element of composer.json.
{
            "type":"vcs",
            "url": "https://github.com/getinstancemz/scriptutils"
        }
Now that the script bundle is available I can add it the require-dev element. Since we haven’t encountered this element yet, I’ll include it in the code fragment:
"require-dev": {
        "getinstancemz/scriptutils": "dev-develop"
    },
When you make changes to composer.json you must run composer update to apply any amendments or additions you have made. Having done that in this case you’ll have access to createDBAndUser.sh – my rough and ready shell script that does what it says on the tin. Because createDbAndUser.sh has been configured as a binary it is available in vendor/bin. It accepts three arguments: the database name, the user, and the password:
$ vendor/bin/createDbAndUser.sh getinstance getinstance 123456789
Please enter root db password:

creating database getinstance...
DB creation done
grating privileges for getinstance
done granting privileges for getinstance
Whatever method you used, at this stage you should have a database, a user, and a password.
Introducing wp-cli
The WordPress community is quite GUI-oriented and we swim a little bit against the current with this Composer, git and CLI stuff. Luckily, we’re far from alone. Take a look at http://wp-cli.org/ and gasp with geeky delight. Yes! A complete command line WordPress management system! We have to have this, right? Well the tool is on packagist so all we need to do is add a line to our composer.json require element:
"wp-cli/wp-cli": "1.0.0"
Don’t forget that if you add an element to a list in json, the preceding element will need to be given a comma, or the parse will fail. Now run composer update to get your hands on wp-cli.
Note: you can also install wp-cli globally on your server using the phar file – but we’ll keep things local in this example.
Generating the Configuration File
Now that we have wp-cli, generating configuration for the first time involves no editing at all.
$ vendor/bin/wp core config \
    --dbname=getinstance \
    --dbuser=getinstance \
    --dbpass=123456789 \
    --dbprefix=gi \
    --path=site/wp
Success: Generated 'wp-config.php' file.
Note that I am running the script from my distribution root directory (which is where vendor and composer.json live) and WordPress has been installed two directories down at ./site/wp. I must tell wp-cli about this by passing it the --path flag.
Take a look at the generated file. For now, you’ll find it at site/wp/wp-config.php. As you should see it is filled out with database credentials and other useful stuff.
Installing the Database Tables
We have already created the database, but it’s empty of tables. Now that we have wp-cli and a filled out configuration file we can do the installation with a single command (although I’m passing along quite a lot data).
vendor/bin/wp core install \
    --url=https://getinstance.com \
    --title=getInstance \
    --admin_user=bob \
    --admin_email=matt@getinstance.com \
    --admin_password=pipplumb \
    --path=site/wp
Success: WordPress installed successfully.
But wait! We’re Running WordPress in a Subdirectory!
Yes. I had to make life difficult for myself, didn’t I? But we’ll likely want to do our own stuff outside of WordPress, and life will be much easier if we have our own Web root. So let’s get on with it.
The first thing we need to do is alter a setting, to tell WordPress that the actual guts of the code live in the wp subdirectory. We do that by setting the siteurl option.
$ vendor/bin/wp option update \
     siteurl https://getinstance.com/wp \
     --path=site/wp
Success: Updated 'siteurl' option.
Next, we need to copy index.php up a level from where it was placed by composer (site/wp/) to our Web root (site/).
$ cp site/wp/index.php site/
Now to move the configuration file:
$ mv site/wp/wp-config.php site/
Finally a little bit of editing is needed. I need to alter a require statement in index.php.
require( dirname( __FILE__ ) . '/wp-blog-header.php' );
Must become
require( dirname( __FILE__ ) . '/wp/wp-blog-header.php' );
Similarly, in wp-config.php the ABSPATH should be changed from:
if ( ! defined( 'ABSPATH' ) )
    define( 'ABSPATH', dirname( __FILE__ ) . '/' );
To
/** Absolute path to the WordPress directory. */
if ( !defined('ABSPATH') )
    define('ABSPATH', dirname(__FILE__) . '/wp/');

define('WP_CONTENT_DIR', __DIR__ . '/wp-content');
define('WP_CONTENT_URL', 'http://' . $_SERVER['SERVER_NAME'] . '/wp-content');

/** Sets up WordPress vars and included files. */
require_once(ABSPATH . 'wp-settings.php');
Notice the sneaky addition of WP_CONTENT_DIR and WP_CONTENT_URL which are there not to accommodate the wp subdirectory but the fact that I am managing a custom location for wp-content.
The Moment of Truth
So what have we done? Let’s fire up a browser and find out. In my case the URL is https://getinstance.com/.
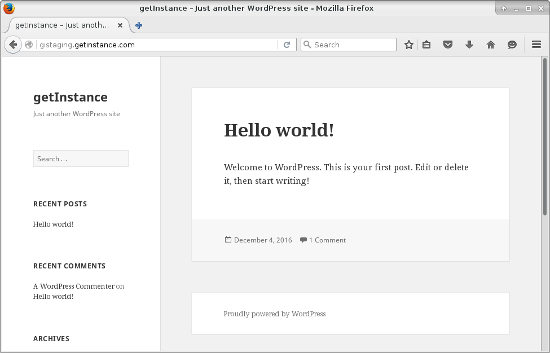
So far, so generic. Let’s take a look at the admin environment – specifically the plugins page. Remember that WordPress actually lives in the wp/ subdirectory so the URL for the admin is https://getinstance.com/wp/wp-admin.
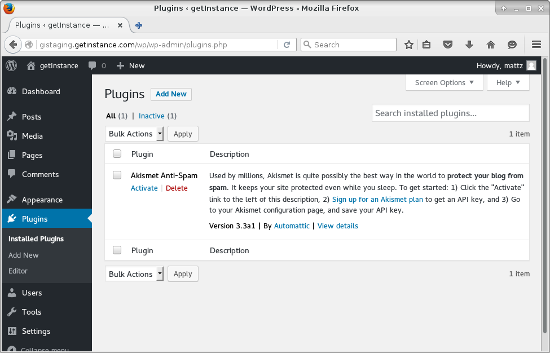
So what does this demonstrate? Firstly that we are able to access the admin environment – always reassuring. More importantly, you can see that the sole plugin there is Akismet. This is the plugin we configured in Composer and installed into our external wp-content directory at site/wp-content. Importantly it is not the default Hello Dolly plugin that ships with the WordPress distribution and can be found in site/wp/wp-content.
Tomorrow we’ll look at what the heck we’re going to commit into version control.
_
photo credit: onnola 4 via photopin (license)_